Bridal Madness: Vintage Bridal & Baby Shower Party Plans

(Thursday Thirteen header by Jenn.)

Are a lot of your friends announcing engagements, getting married and having the stork visit — so many, that you’re running out of party ideas and ways to celebrate? Here are 13 vintage ideas, loaded with kitsch and just begging you to use them, maybe even update them a bit…

Remember — all the images get much much larger when you click them — so read away!

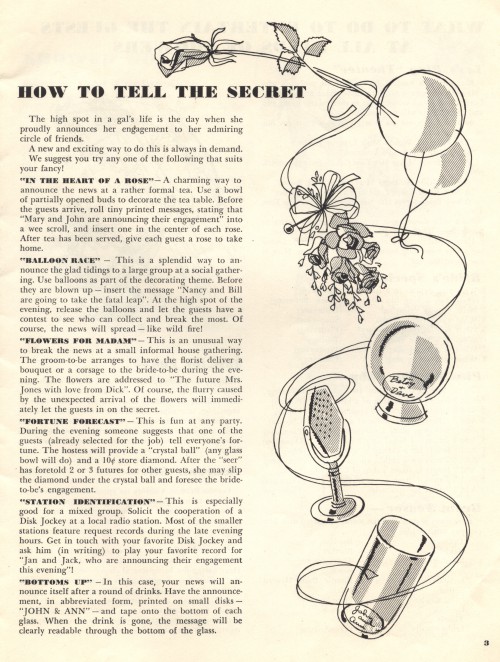
1. How To Tell The Secret, aka bridal announcement ideas, from The Bride’s Party Book, published by Dennison. Some of these may be tweaked to fit other announcements — or even used to invite guests to the next event.

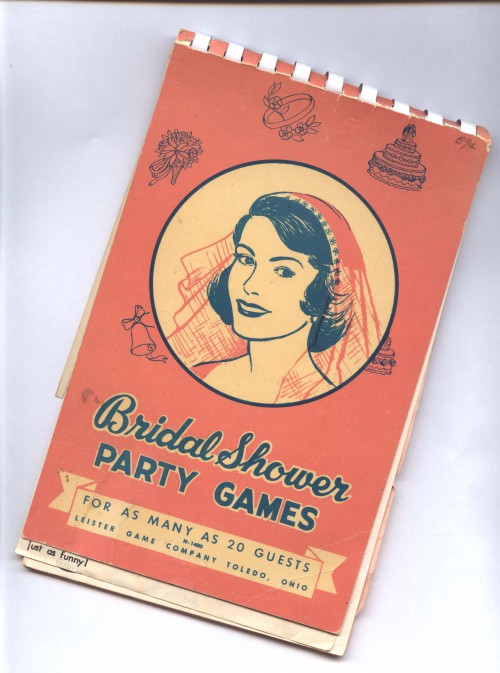
2. The next few bits come from Bridal Shower Party Games, “For As Many As 20 Guests” (presumably because it originally had 20 copies of each of the game sheets), Leister Game Company, Toledo, Ohio, (N-1400). The company is still around (but the site isn’t working — or they did just perish — so some links are to Goggle cache).

Inside the front cover, ads for baby & bridal party games and products. The company has gotten racier since then; now they have “Naughty Bingo” and “Condom Blow Jobs”. So you may prefer the quaint & corny vintage Leister games.

Anyway…

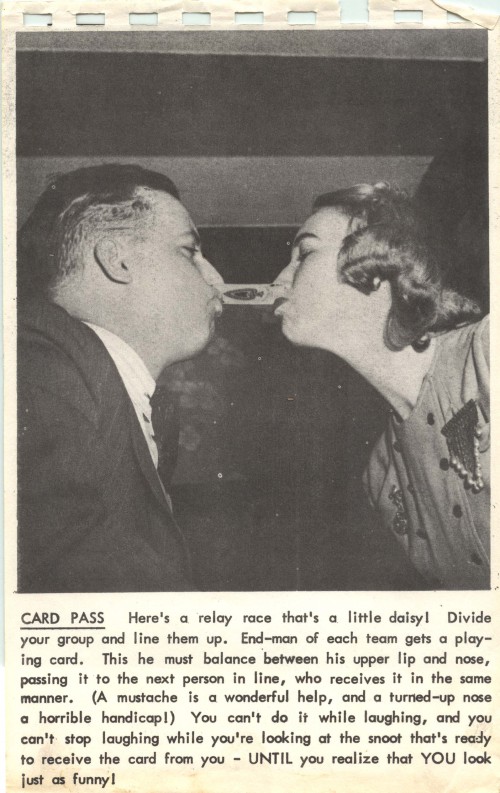
One of the party games is Card Pass — “a relay race that’s a little daisy!”

Totally believe you should open a brand new pack of playing cards for this; you don’t know where the hands of previous card holders have been and you’ll be sticking them in your mouth. :shudder:

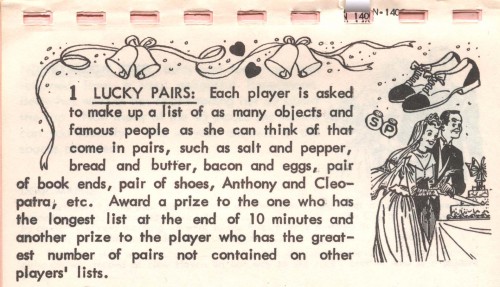
3. A game called Lucky Pairs:

4. Want-Ad Marriage (which, by the way, is also a fun game to play on girls’ night — having you write each other’s ads):

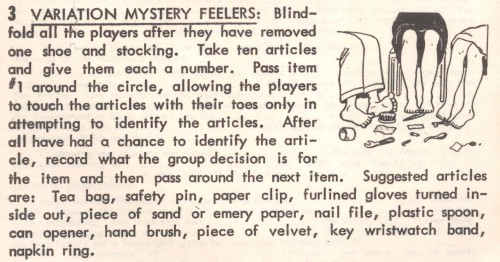
5. Variation Mystery Feelers

(Don’t know about you, but I don’t want any of the objects back — they’ll be covered in toe-jam!)

6. A Game Of Pairs


(I could be crazy, but didn’t we just do that?)

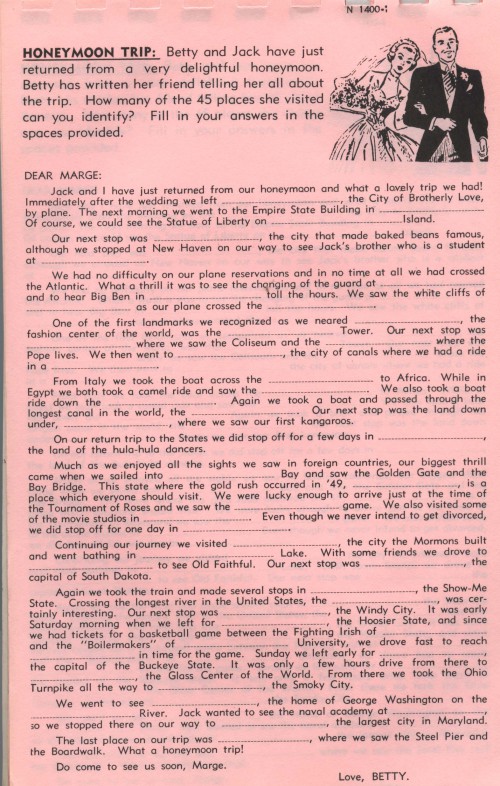
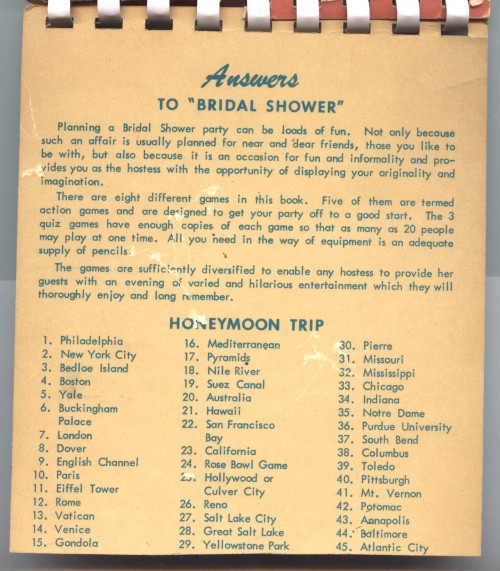
7. This next one is a fill-in-the-blank game — but don’t get excited thinking it’s a Mad-Lib; it’s a geography quiz. You fill in the blanks of the Honeymoon Trip.

Sadly, the answers were on the back cover which has been cut; so you’ll have to figure out some of these by yourself. (Treat it like a test — like you have to be this smart to get married.)

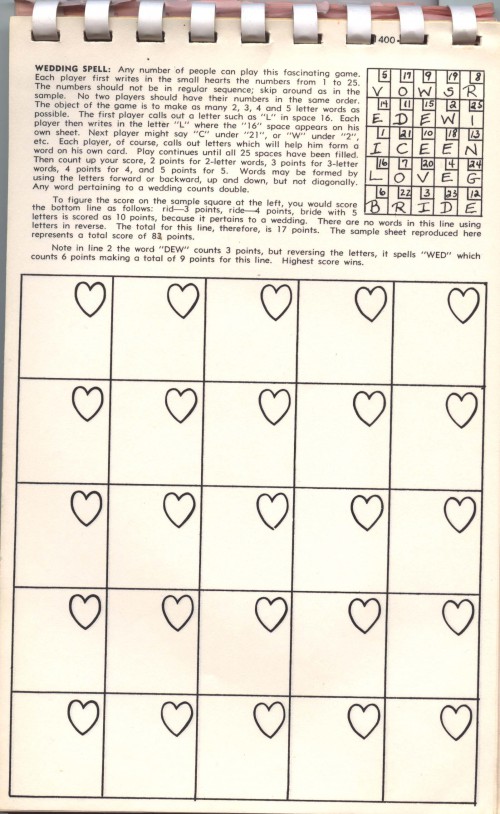
8. This next one, Wedding Spell, is some twisted spelling bingo thing. Too complicated for me these instructions are. May Yoda help me.

9. Back to the Dennison’s book again…

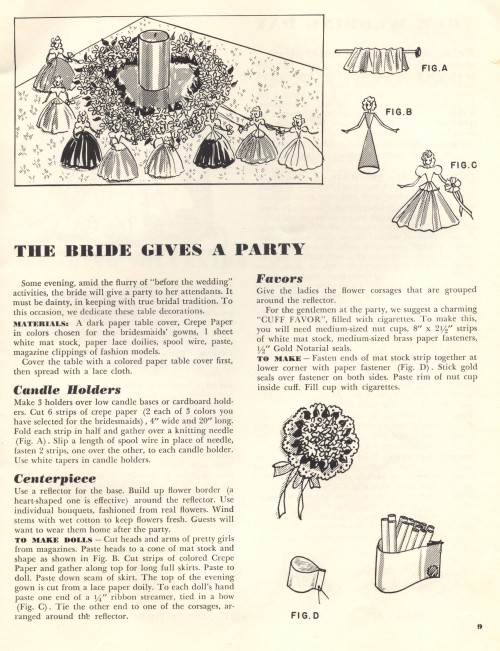
This time, it’s the bride who gives a party (and isn’t it about time!)

I love the sweet-kitschy-goodness of making these little dolls with faces cut from magazines — I totally want to do this for other parties (but that could be another list of 13…)

And the legal team wants me to tell you not to stuff the cuff party favor with cigs; totally not healthy or PC, you know.

I’m totally skipping the wedding day stuff; I’m certain your bride is not going to let you make crepe paper couple centerpieces. Or crepe paper anything. That doesn’t make her Bridezilla either; she just doesn’t want the kitsch enshrined forever in photos on the in-laws mantle.

(If, for some reason, you need these crepe paper frights delights, let me know.)

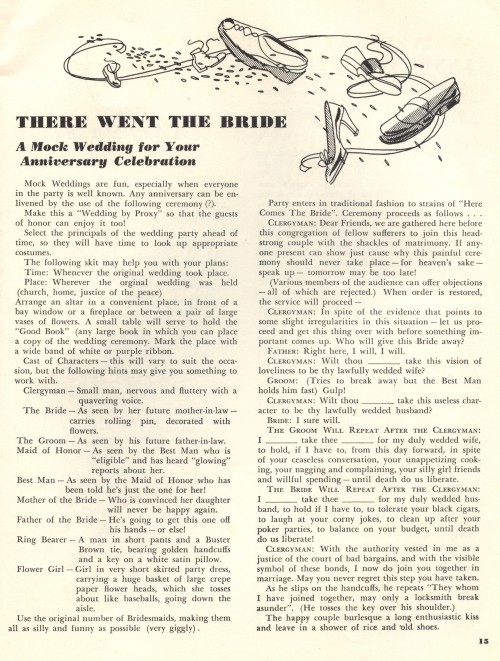
10. “There Went The Bride” is “A Mock Wedding for Your Anniversary Celebration” — complete with kitsch skit.

Highlights include:

The bride “as seen by her future mother-in-law — carries rolling pin decorated with flowers”.

The clergyman begins the ceremony with, “Dear Friends, we are gathered here before this congregation of fellow sufferers to join this headstrong couple with the shackles of matrimony. If anyone present can show just cause why this painful ceremony should never take place — for heaven’s sake — speak up — tomorrow may be too late!”

The groom, repeating after the clergyman, vows: “I ____ take thee ____ for my duly wedded wife, to hold, if I have to, from this day forward, in spite of your ceaseless conversation, your unappetizing cooking, your nagging and complaining, your silly girl friends and willful spending — until death do us liberate.”

The bride, repeating after the clergyman, vows: “I ____ take thee ____ for my duly wedded husband, to hold if I have to, to tolerate your black cigars, to laugh at your corny jokes, to clean up after your poker parties, to balance on your budget, until death do us liberate!”

It’s not just me who sees the bitter irony in these two sets of vows… Is it?

Well, at least the ceremony ends with handcuffs… :wink:

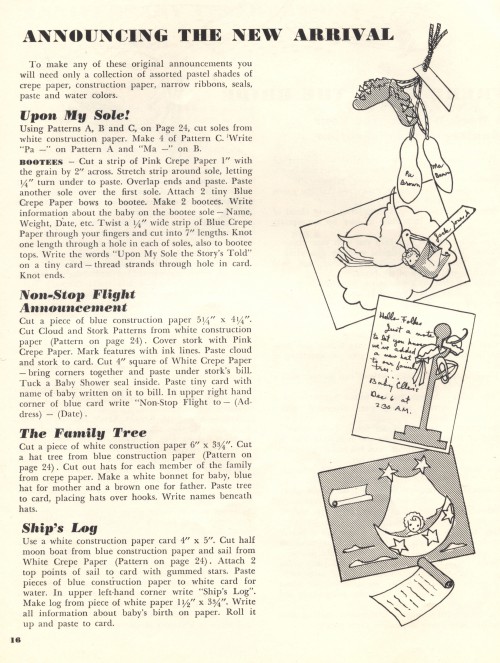
11-13 First comes love, then comes marriage — and if you make it through the mock wedding anniversary celebration — next comes your friend with a baby carriage. Some announcements for the new arrival:

Upon My Sole! Announcements with a shoe theme
Non-Stop Flight Announcement has a flying stork theme
The Family Tree is an announcement stretching things — using a hat rack?
Ship’s Log has a nautical theme.

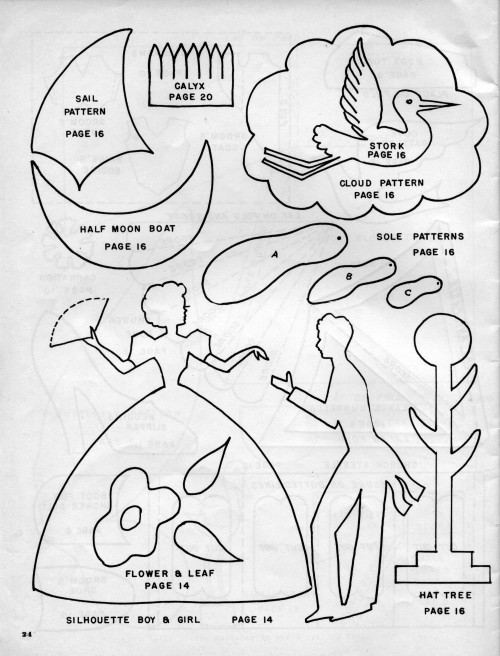
All the patterns for these baby announcements are found on page 24 and the scan is here:

Get the Thursday Thirteen code here

You Can’t Cover Your Fingernails In Velvet, Even When You Want To

I thought I was going to have this fab-u-lous Valentine’s Day beauty project for you, but I ran into a few problems along the way…

I had the concept: Wrapping your fingernails in red velvet.

Ridiculously impossible sounding as far as living with them goes — they’d be sure to get full of gunk and even showering would be a disaster. But the idea of one romantic night where you could both look and feel so glamorous that practicalities were of no consequence was seductive… What would it feel like to run bits of velvet along my skin… His skin… So unexpected!  Plus, I just lurve red velvet, so practicality be damned!

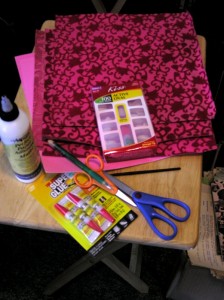
I knew a few things would be problematic going in to this project… Like fabric itself was going to be a real bitch because getting it to adhere and keeping the edges from fraying were going to be too monumental for my wee crafting skills. So I immediately thought of flocked paper — the very same paper used by altered artists and scrapbooking folks. I headed out to Hobby Lobby.

But it was February 11th, and if they ever had red flocked paper, they were out. So I went to Michael’s. Even worse, no flocked paper at all.  So back to Hobby Lobby again to buy the pink flocked paper — and a paper with a red flocked pattern because, I figured, with the size of fingernails, I could get a few out of those wide areas and maybe a stripe of red ‘velvet’ would be cool too. (OK, and I bought a few other sheets of a pink pattern because it was on sale at 50% off. And because I could.)

I went to Wal Mart, intending this to be a quick run-in for a box of Lee press-on nails — only to find that the world of fake nails has become much larger and cheesier than ever. No Lee press-on nails either. So I carefully selected fake nails that did not involve the dreaded acrylic powder (which would render my very temporary red velvet nails far more of a mess at removal time than making them would be) and ended up with a box of 100 Kiss Active Oval glue-on nails for like $5.

I got all my items together and ambushed hubby when he came home for lunch today to take the pictures — because I knew with my hands busy, someone would need to snap the photos.

The plan was relatively simple:

1 Select the nail that fit you, file off that center ‘prick’ with a nail file. Shape it a bit if you wanted to.

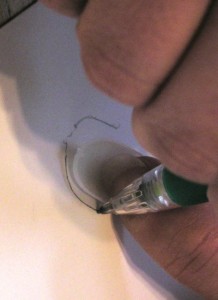
2 On the back of the flocked paper, trace the nail — rolling it as you did so, in order to get full coverage of the fingernail.

3 Cut out the fingernail shape you traced, staying just slightly inside the tracing line so that you’d fit the nail and not end up with discolored edges along the sides of your nails.

All that went swimmingly; now it was time to for step 4: glue them on. In order to better assess which type of glue would be best (and to inspect the fit of the flocked paper nail), I placed the paper cut-out nail on the top of the curved plastic Kiss nail. Quickly I discovered that the paper was too thick; it would not nicely curve around the plastic nail without leaving a bump or fold-like area. Hmmmm…

Hubby suggested I tear off the white paper backing, removing a layer to make it thinner. So we did that and it curved much better. As a razor was required to get the separation started, I decided to cut a section from the flocked paper sheet & separate if first, then trace and cut. Now I had two pink flocked paper nails to apply.

I figured the Super Glue would be problematic; be too fast drying for all the curving & smoothing required, that the glue might seep through the paper making an unsightly mess of the paper, or that I’d end up gluing my fingers to themselves or attaching them inappropriately to the fingernail. So I decided to try US ArtQuest’s Perfect Paper Adhesive 8 Ounce-Matte first. (It’s my favorite glue/adhesive.) I applied an even, medium coat to the plastic nail and formed the pink flocked paper over the top of it. The edges just didn’t want to remain down.

I briefly considered a few other options, such as making larger pieces of the paper nails to fold around the edge — but then I’d have to cut sections to fit the curves. Ugh.

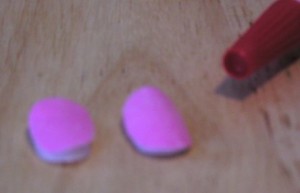
I decided that we were close… but not quite there… Maybe the Super Glue would work. So I used that on the second try. The bad news was that it worked even worse. The good news was that I was right about how much more troublesome the glue would be — and that even with a few scary moments, I did not end up glued to anything.

(Nail on the left was created with Super Glue; nail on right using PPA.)

So, I’ve not yet found a way to get red (or any other color) velvet fingernails. Not for this Valentine’s Day, anyway.

Got any ideas on how to do this? Hit me with ’em.